F/T sensor
An Aidin AFT200-D80 force/torque (F/T) sensor can sit between the Neuromeka Indy7 v3 tool flange and the gripper. The tool board passes its values over EtherCAT, so there is no extra wiring and no driver to start.
At a glance
| Step | Where | Result |
|---|---|---|
| 1. Setup | Pick the sensor model in the robot profile | Values show in the Pendant, TUI and Lab from the next stack launch |
| 2. Zero | The Pendant F/T card, or the ft_ service | The sensor stores the current value as zero inside the sensor (kept through power-off) |
| 3. Read | measured. in a plugin | Values arrive with the zero already removed |
| 4. Remove the payload (optional) | Pendant Payload measurement → ToolLoad in the plugin | Only external force remains, whatever the pose |
Values are in sensor coordinates with no gravity compensation. The gripper's weight reads zero only in the pose where you zeroed; in other poses it shows up as force again. Step 4 removes it.
The sensor axes point the same way as the tool axes, and a force applied to the sensor reads positive: pushing the tool toward +Z raises Fz.
1. Setup
Pick the F/T sensor model in the robot profile, from any of these:
- Robot edit in the TUI settings (
,) - Robot edit in the Teaching Pendant settings
plem profile set-ft-sensor <robot> aft200_(d80 noneto remove it)
The saved value applies from the next stack launch. Grippers and cameras are chosen separately.
- Saving is refused for robots that do not support the sensor. The AFT200-D80 supports only the Neuromeka Indy7 v3.
- If the tool board firmware has no F/T relay, saving works and after launch you see "The tool board provides no F/T signal".
- If you write a sensor into the profile by hand but the robot description (URDF) has none, the robot launches without F/T and logs a warning. The Pendant shows no F/T chip and the TUI keeps showing "no signal". If the robot has no sensor, remove it from the profile.
Fitting or removing the sensor changes the tool tip height, so the camera position changes too. Saving and launch are not blocked; you get one warning. To keep using the camera, run calibration again.
2. Zeroing
Zero from the Zero button on the Pendant F/T card (Screen layout), or call ft_ from a program. Before you zero, make sure nothing touches the tool and put the robot in the pose where you will read values.
- Success: right after zeroing the robot reads the values again and reports success only if every axis is within 1 N of force and 0.05 N·m of torque. Otherwise it returns failure with the values it read. Moving the tool or touching something during that check also fails it.
- Refused by the robot, with a reason, from the Pendant or the ROS 2 service alike: while the sensor is starting up, when the sensor is not found, while the robot is moving, while a previous zero request is running.
- Locked only in the Pendant during a Job and during Jog. A program chooses its own moment.
Zeroing is allowed in OVER_ and OUT_; zeroing with no load is how those states clear (states). Zeroing under load stores a wrong zero, and while that zero is in use the over-rated warning comes late even when the real force exceeds the rating.
3. Reading in a torque controller plugin
Read the sensor every control cycle in compute() of a custom torque controller. Create the plugin with plem init my_; compute() is in include/ and src/. The sensor has already applied the zero, so use the values as they arrive. The example below is in one file for readability.
#include <plem/control/plugin/torque_plugin_sdk.hpp>

namespace my_controller {
using namespace plem::control::plugin;

class MyController : public TunableController {
  public:
    using TunableController::TunableController;

    void compute(const Measured& measured, const Target& target,
                 double* output_torque, bool /*free_drive*/) const override {
        for (std::size_t j = 0; j < measured.dof(); ++j) {
            output_torque[j] = 0.0;  // ← your control law, working without force
        }

        const auto w = measured.wrench();  // zero already removed
        if (!w) {
            return;  // no sensor, or invalid this cycle → no force term
        }
        const double fz = w->force.z;   // [N]
        const double tx = w->torque.x;  // [N·m]
        // add a force term using fz and tx to output_torque
    }

    void reset() noexcept override {}
};

}  // namespace my_controller

PLEM_TORQUE_PLUGIN(my_controller::MyController);
| Accessor | Returns |
|---|---|
measured. | force. [N], torque. [N·m], frame_ (sensor frame). std:: when there is no value |
measured. | Why there is no value; OK when there is one (table) |
measured. | A number that changes with each zero command (it can change even when the Pendant reports failure) |
A NaN output makes the robot set every joint torque to 0 and trip a Protective Stop. In cycles where wrench() is empty, control without the force term.
- On a robot with no sensor the plugin still loads, and
wrench()is always empty. frame_is the sensor's measurement origin. For the AFT200-D80 that is 14.8 mm below the top of the F/T stack, per the vendor CAD.id - Plugins built before F/T reading existed work exactly as before, without a rebuild.
Noticing a zero change
You need this only if the plugin keeps its own force baseline. While zeroing, the state is ZEROING (no value), and wrench_ changes the moment it ends. The value jump in that first cycle comes from the zero, not from contact, so take a new baseline there:
if (measured.wrench_zero_seq() != last_zero_seq_) {  // in compute(), when w is valid
    last_zero_seq_ = measured.wrench_zero_seq();     // members: mutable, since compute() is const
    baseline_fz_ = w->force.z;
}
4. Removing the payload (optional)
Use this when you want only external force, whatever the pose. Nothing warns or blocks if you skip it.
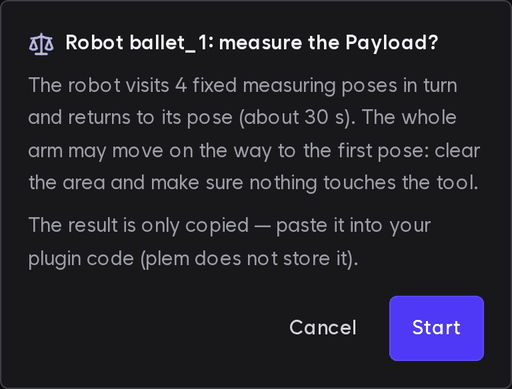
The whole arm can move to reach the first measurement pose. Clear the area and make sure nothing touches the tool before you start.
-
Put the robot in TRAJECTORY mode. It must not be in a Protective Stop. In BRAKED or any other mode it does not move to the measurement poses.
-
On the F/T card, press Measure Payload, then Start. The robot visits four fixed measurement poses (fixed joint angles) and returns to where it started. It takes about 30 s, and the card's Stop stops it at any time.
-
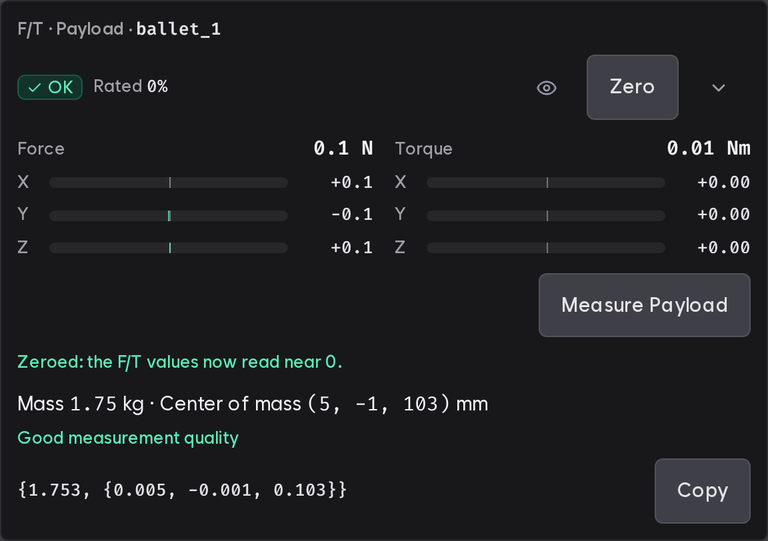
Press Copy on the result. It copies four values: the mass [kg] and the center of mass [m] in sensor coordinates. If you see Large residual, make sure the tool and cables touch nothing and measure again.
-
Build a
ToolLoadfrom the copied values and usecompensate()instead ofwrench().plem initalways generatestool_. plem does not store the values, so keep them in your project (code, a file orload. hpp plugin_). Compared with the example in §3, add the include and member, replace theconfig_ json using TunableController::line with this constructor, and read fromTunableController; compensate():
#include "my_controller/tool_load.hpp"

explicit MyController(const PlemPluginContext* ctx)
    : TunableController(ctx),
      tool_load_(ctx, ToolLoad::Params{1.753, {0.005, -0.001, 0.103}}) {}  // values copied in step 3

const auto f = tool_load_.compensate(measured);  // in compute(): zero and payload removed
ToolLoad tool_load_;                              // private member
| When the baseline is taken | Automatically, at the value of that moment: the first time the robot stands still for 150 ms after launch (usually right after the first brake release), and when it stands still for 150 ms after a new zero. Before that, compensate() returns std::. You do not need to zero at every launch |
| At that moment | Nothing may touch the tool. If the baseline is off, zero once with nothing touching to fix it |
| No F/T sensor | Creating ToolLoad fails and the plugin does not load |
| Measure again | After changing the gripper, camera or mounting. Measurement poses exist only for Indy7 for now |
- The error grows with distance from the baseline pose: about 5–7 % of the change in how the payload weight acts on the sensor remains. On an Indy7 with an RG6 it was typically 0.4–0.7 N, and about 1.2 N with the wrist turned more than 60°. Set contact thresholds above that.
- It assumes standstill or low speed. There is no inertial term.
- Sensor drift after the baseline is not removed.
- Mounting tilt, cable tension, gripper finger position and the weight of a held part are not included. Keep the fingers in their usual position when you measure.
On screen
- Teaching Pendant: the F/T chip and card in the 3D view, and F/T warnings in the bottom bar (Screen layout).
- TUI: the F/T line in the robot detail (Robot control).
- Plem Lab: plots and file export of the values (Signals).
- Programs and skills cannot use force values as conditions or inputs.
Rating and states
The rating is 200 N of force and 15 N·m of torque. The combined load is the larger of |Fxy|/200 + |Tz|/15 and |Fz|/200 + |Txy|/15. Above 105 % the values become invalid with a warning; below 100 % they recover.
Any state other than OK means the values are invalid (NaN) and the plugin's wrench() is empty. Screens show a status sentence; the ROS 2 status topic and the plugin's wrench_ carry the code of the same name.
state | Status sentence (start) | Meaning | What to do |
|---|---|---|---|
OK | OK | Normal | — |
ZEROING | Zeroing the F/T sensor | Zeroing (usually under 1 s, a few seconds at most). When it ends, zero_ changes and values return | Wait |
STARTING | The F/T sensor is starting up | The sensor is getting ready after launch. It waits for the robot bus first, so this can take tens of seconds | Wait |
OVER_ | Rated load exceeded | Over the rating. With nothing touching the tool, the stored zero may be wrong, or the payload shows up large because the pose differs from the zeroing pose | Reduce the force on the sensor. If it persists with nothing touching, zero again in the working pose |
OUT_ | Force or torque exceeded the measurement range | At least one axis went past the measurement range (about 16.4 N·m of torque, about 655 N of force), and its value may have wrapped. Detected from sudden jumps between samples, so a very short, very large shock or a load already present at launch can be missed | Remove all force, then zero again |
NOT_ | The F/T sensor is not responding | EtherCAT communication lost, cable unplugged or bad contact, tool board auto-detection failed, or a sensor fault | Check communication and the cable, power-cycle the robot, then restart the robot stack. The sensor mode is set only at launch, so a restart is the sure fix |
FROZEN | The F/T sensor values are not updating | All six raw values unchanged for more than 20 ms. The tool board keeps sending the last value when the cable is out, so this counts as no answer. Possible causes: cable unplugged or bad contact, sensor power, tool board fault | Check the cable and connection. It clears by itself once values change. Right after reconnecting, values can drift for a while (tens of seconds on the real robot); wait, then zero again |
NO_ | The tool board provides no F/T signal | The tool board firmware has no F/T relay, or this robot has none | Check the F/T warning in the robot launch log |
STALE | (plugin only) | No new value for more than 5 ms. It may continue | Control without the force term |
NO_ | (plugin only) | The robot has no sensor | — |
STARTING, ZEROING, OVER_ and OUT_ are warnings (WARN); the other faults are errors (ERROR). A sensor problem does not stop the robot; only the F/T values become invalid.
Using ROS 2
For a robot named robot_1:
ros2 topic echo /robot_1/ft_sensor/wrench          # force and torque (100 Hz)
ros2 topic echo /robot_1/ft_sensor/status          # state: state and zero_seq in values
ros2 service call /robot_1/ft_sensor/zero std_srvs/srv/Trigger   # zero
The full rules for the topics and service (NaN, zero_, other frames, web clients) are in ROS 2 interfaces.