Experiments and simulation
To measure a controller's response, you feed it a defined stimulus, such as a step or a sine, and record what happens. Building the stimulus and running it happen in two places:
- Build the stimulus in the Experiment tab. The robot does not move.
- Check it in the Simulation tab, then run it.
Building a stimulus (Experiment)
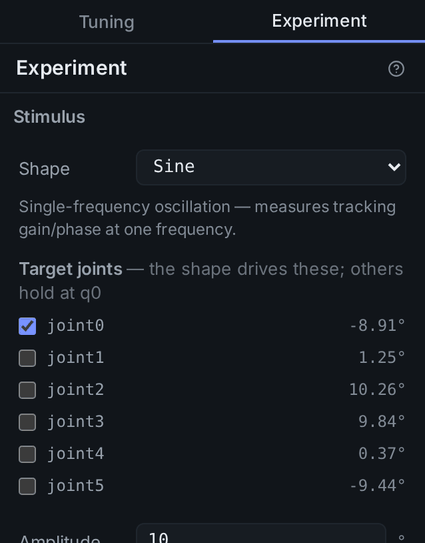
- Choose a Shape.
- Under Target joints, check the joints to move. For Sine, Chirp and Step, every checked joint gets the same amplitude. For Waypoint, you enter values per joint.
- Enter the parameters.
- Speed limit is a ceiling, not the speed the stimulus runs at. A stimulus that exceeds it cannot be run in the next step.
- Press Generate. The robot does not move; Lab switches to the Simulation tab.
Every stimulus starts from the current pose.
| Shape | Measures | Parameters (defaults) | Ends at |
|---|---|---|---|
| Sine | Response amplitude and phase at one frequency | Amplitude 10° · Period 4 s · Cycles 3 | The starting pose |
| Chirp | Response across a band, sweeping from a low to a high frequency | Amplitude 4° · Start freq 0.2 Hz · End freq 1 Hz · Duration 8 s | The starting pose |
| Step | The classic step response: rise, overshoot, settling. A long Rise with Hold at 0 gives a smooth move with gentle acceleration | Offset 10° · Rise 0.5 s · Hold 3 s | The starting pose shifted by the offset |
| Waypoint | A time–angle table you type in, smoothly interpolated | Edit the table. Values are relative to the current pose (Δ°) or absolute (°) | The last point |
Changing a parameter discards the previous result. If Lab has not yet received the joint states or the robot's limits, Generate is refused with the reason.
Checking and running (Simulation)
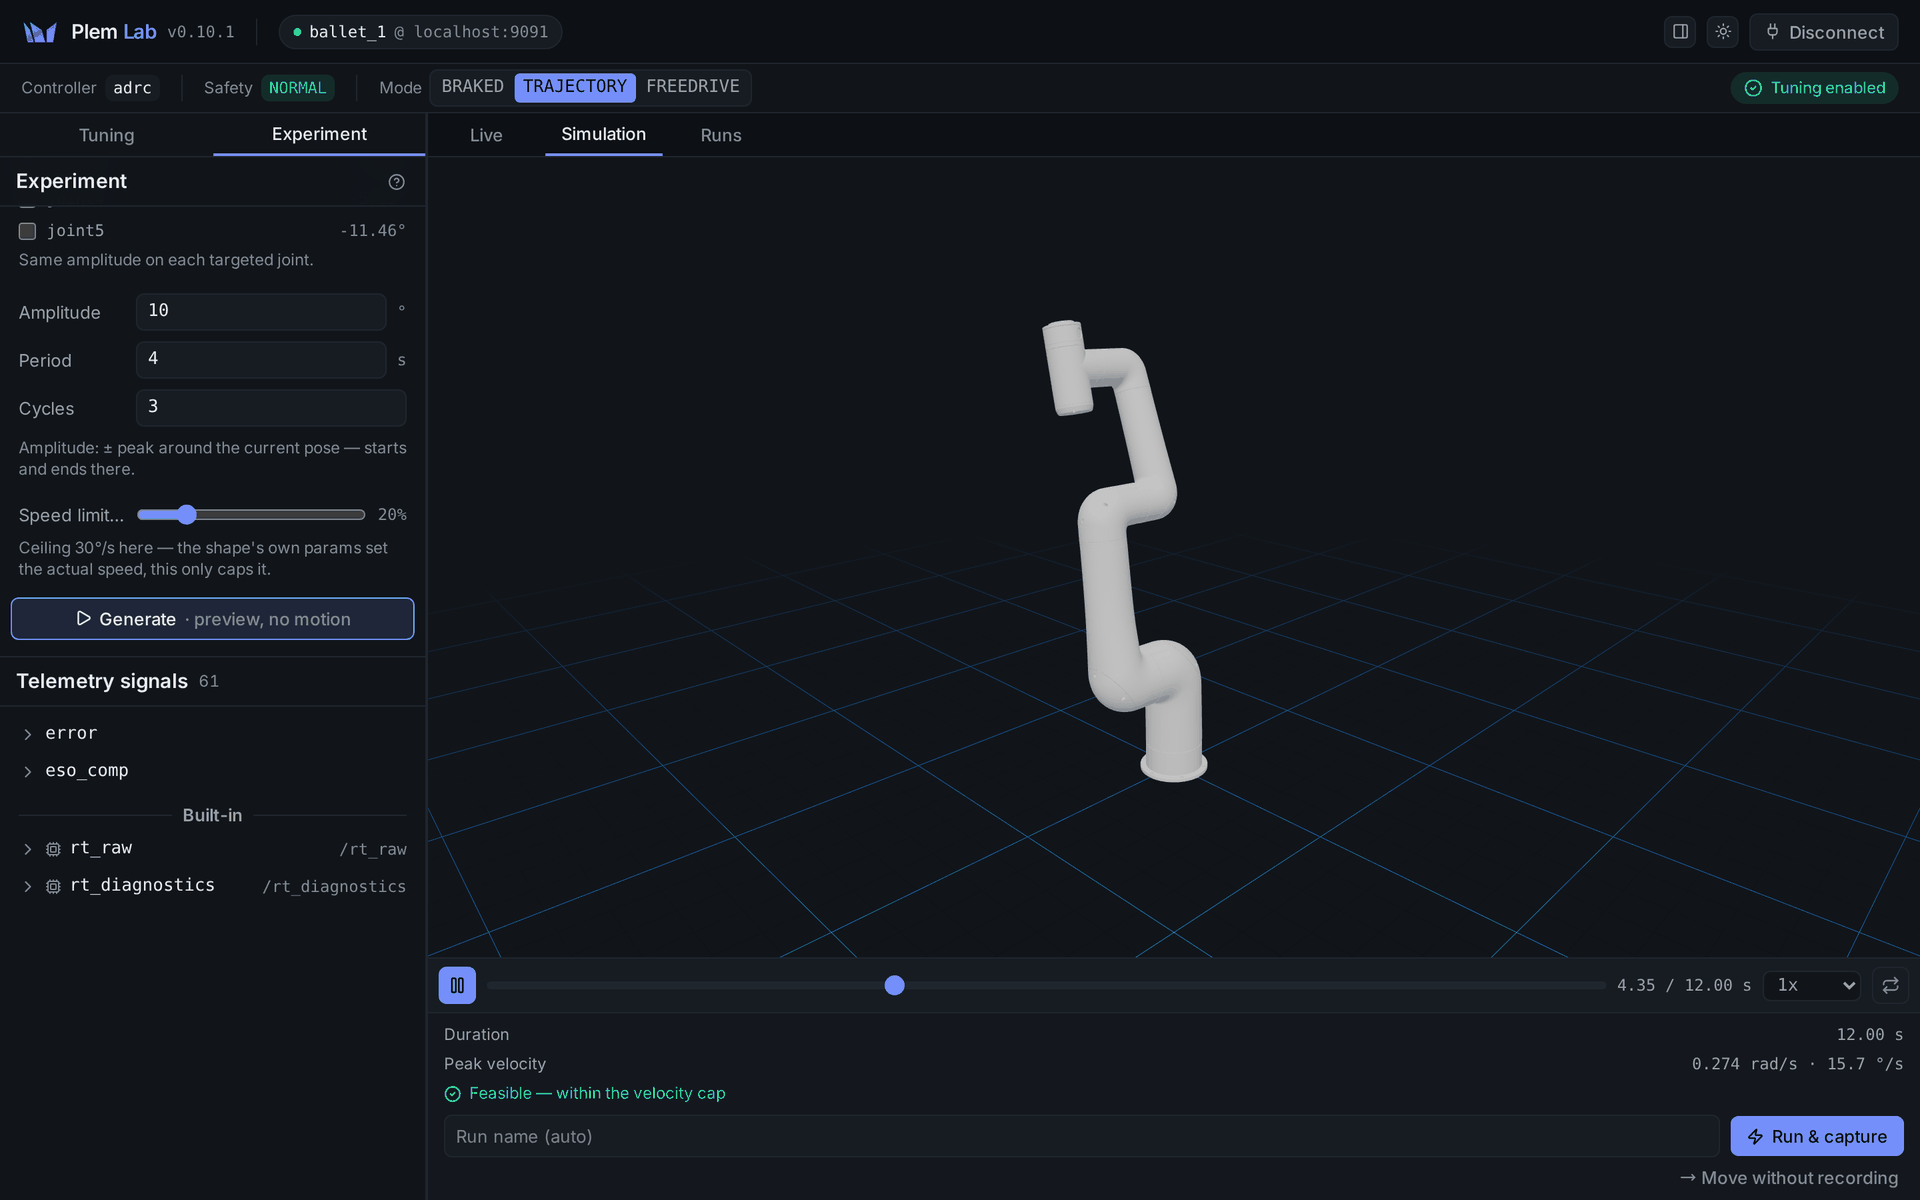
The top half is the preview: a 3D robot plays the stimulus, with play, rewind, speed and loop controls. Without the robot model (robot_) Lab cannot know the joint limits, so Generate stays disabled.
The bottom half is the pre-run check: duration, peak velocity, and Feasible or Infeasible — N violation(s). When it is infeasible, Lab lists which joint breaks which limit and locks the run buttons.
- For a velocity violation, lower the amplitude, lengthen the time, or raise Speed limit.
- For a joint position limit, change the offset, direction or Waypoint targets and generate again.
Clear the work area and stay within reach of the Emergency Stop.
- The robot must be in TRAJECTORY. If it is not, the console tries to switch first.
- Just before running, Lab reads the current pose again. If any joint is more than 3° from the stimulus start, or the pose cannot be read, the run is refused.
- If you moved the robot after generating, generate again.
| Button | Action |
|---|---|
| Run & capture | Runs the stimulus and records the response as a Run. Leave the name empty to get an automatic one (below) |
| Move without recording | Runs without recording. The small button under Run & capture |
| Abort | Shown while running. Cancels the trajectory and sends the robot to BRAKED at the same time, because cancelling alone does not reliably stop it |
The automatic name is built from the controller, the gains changed since the previous run of the same controller (such as kp[0] 200→400), the stimulus and the time.
About recording:
- It captures every signal the controller declares, and keeps recording 0.5 seconds after the trajectory ends to catch the settling.
- It stops at 300,000 samples. At a 1 ms control period that is 300 seconds; a shorter period shortens it in proportion (60 seconds at 0.2 ms).
- The Experiment inputs are locked while recording. What else is locked: What each mode allows.
When recording stops at 300,000 samples, the Capturing indicator changes to Capture full. The move does not stop; it runs to the end. The saved run ends at the limit and is marked as truncated.