Quickstart
The device ships with setup and installation already done. Run plem and you can start; there is no server to launch separately.
Before you start
- The robot control box is powered on.
- The EtherCAT cable is connected.
- The Emergency Stop button is released.
- The computer or tablet you will open the Teaching Pendant on is on the same network as the device.
Without power or the cable, the launch in the next step fails because it cannot find the EtherCAT slave devices.
Launch the robot
Run this in a terminal on the device:
plem
An update prompt may come first. You do not have to update now: decline it or leave it unanswered, and the Start session screen opens.
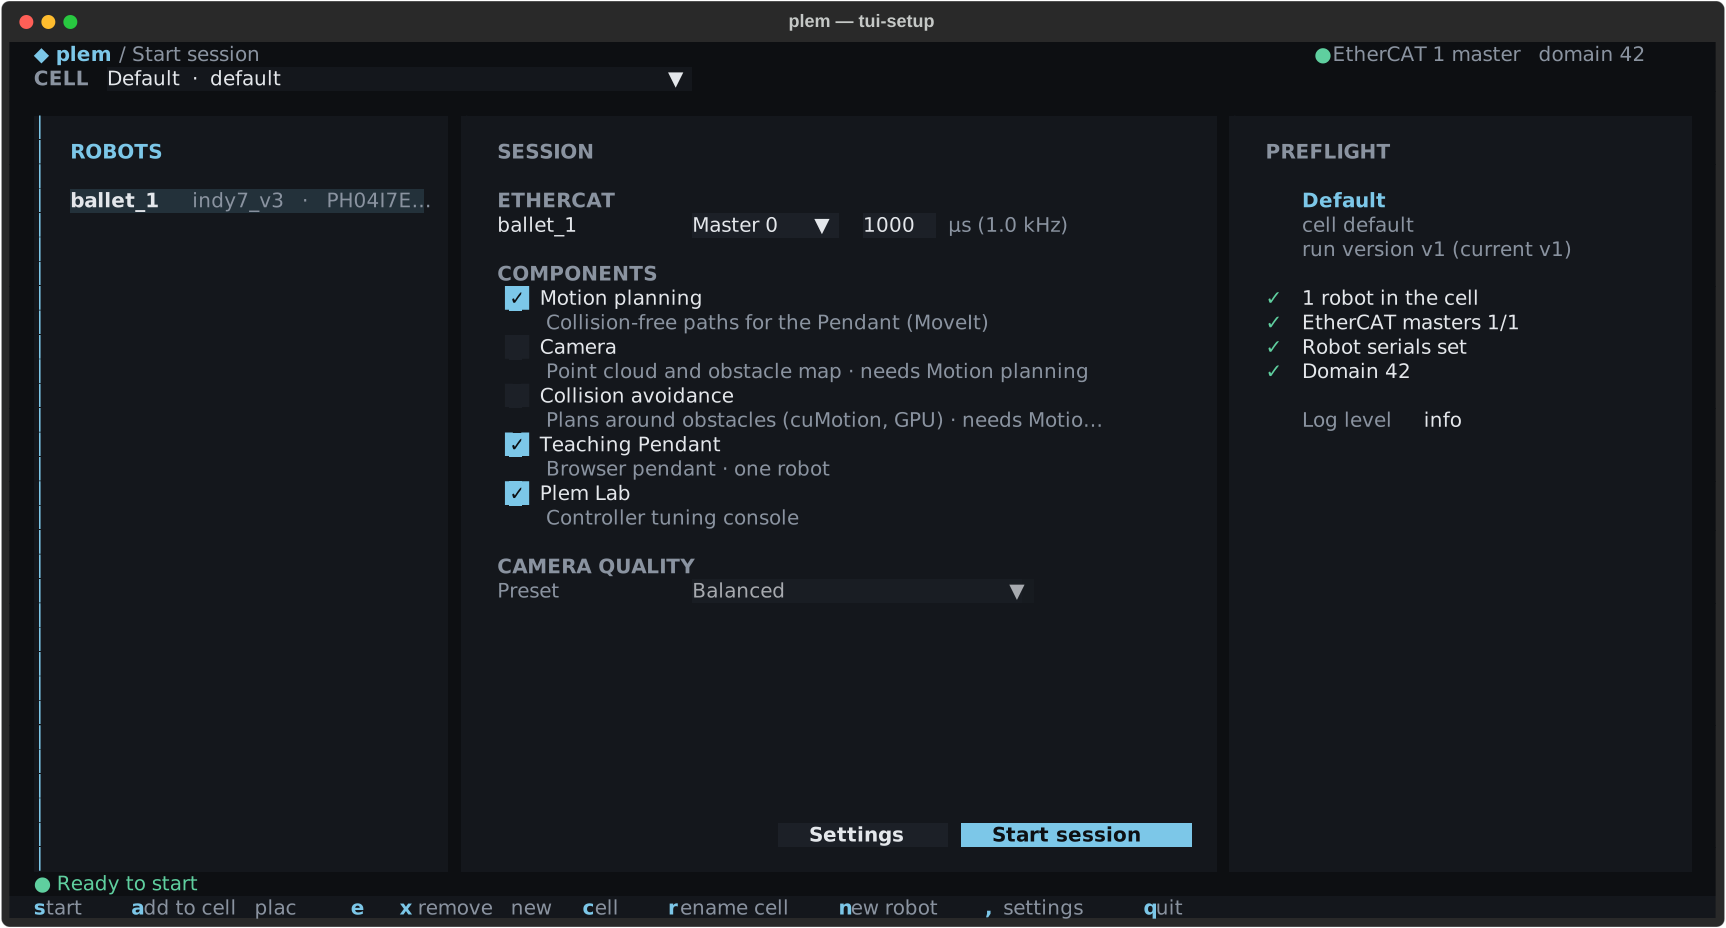
In Start session:
- Pick the cell to launch in CELL at the top. A new device has one cell, Default, and every robot in it is launched. Robot profiles are preset to the delivered configuration. If ROBOTS is empty, contact support.
- Assign an EtherCAT master.
- Leave the control period at the default, 1000 µs.
- Press
stwice, as in the table below.
| Screen | Key | Result |
|---|---|---|
| Start session, once PREFLIGHT on the right passes | s (or Start session) | Opens the Robot Control screen |
| Robot Control | s | Launches the stack. Press it again to stop the stack |
If something does not come up:
- The stack does not launch: Launching the stack
- Other symptoms: Troubleshooting
- What each item on this screen means: Start session
First move
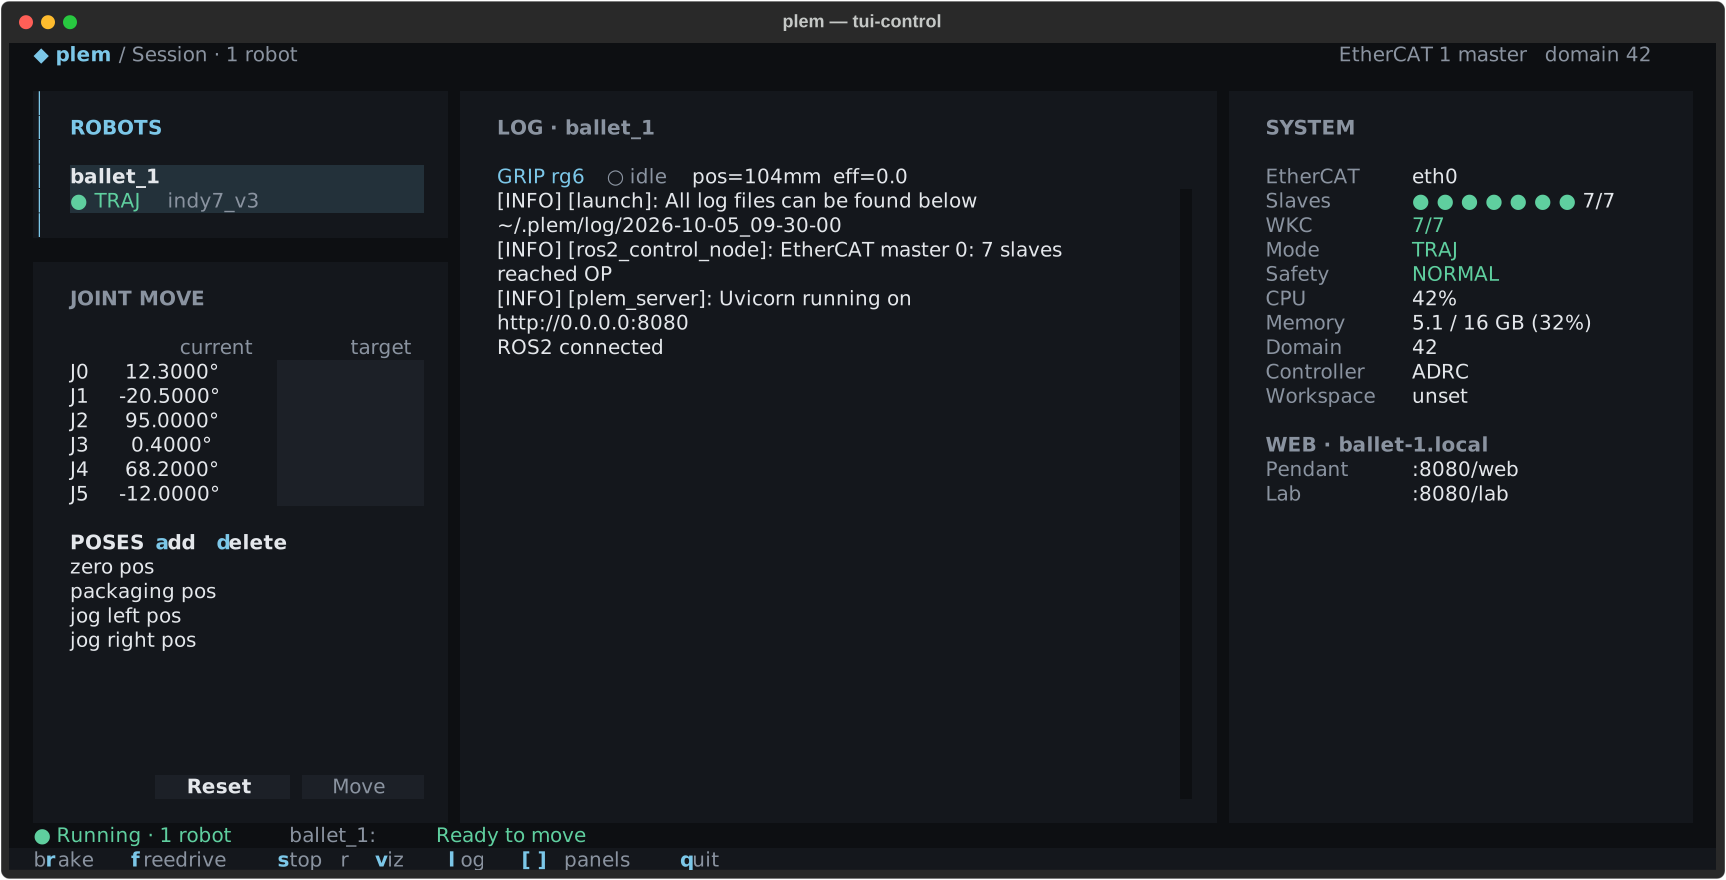
You can check the robot from the TUI before opening a browser. A 6-axis robot has a default pose, zero pos, with every joint at 0 in the JOINT MOVE pose list.
From step 2 the robot can really move. Keep people and objects out of its reach and stay within reach of the Emergency Stop button.
To stop a motion, press r. It switches the robot to the brake, so it can stop abruptly. If the robot does not stop, press the Emergency Stop button. What r does in each mode is on Robot Control.
- Check that the joint states appear on screen and that every slave dot in SYSTEM is green. Do not go on while a dot is red.
- Press
rto release the brake. Move commands are refused while the brake is engaged. - In JOINT MOVE, pick
zero posand press Move. If that pose was deleted, type 0 into each target field. - Check with your eyes and on screen that the robot moved and the joints reached the target. A message that the command was accepted does not mean the robot arrived.
The first move goes from the current pose to all joints at 0 in one motion. From a packing pose this can be a large motion, so clear the area first.
Open the web tools
The Teaching Pendant and Plem Lab come up only if their components were on when you launched. Both are on by default.
WEB in the SYSTEM pane of Robot Control shows the device's address and the Pendant and Lab addresses (in a narrow window, press ] to show the pane). Using each tool: Teaching Pendant, Plem Lab.
If the page does not open, see Troubleshooting › Web tools. If a PLEM is locked page opens instead, the license needs attention: see Troubleshooting › License.
With a monitor on the device, plem-pendant and plem-lab (or the application menu) open a full-screen browser. Close it with Ctrl+W.
Next
- How to use each tool: User guide
- Connecting your own ROS 2 code: Integration
- Moving to a new release: Update
- When something goes wrong: Troubleshooting
- Unfamiliar terms: Glossary